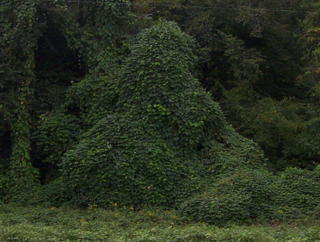
Friday, February 11, 2011

Hi,
I am entering the Philadelphia flower show and want to make my container out of vines .. i was wondering if you could advise me on willow or grapevine... should i boil these also?
Thank you, James


Neil Says:

No! Don't boil them. If you are picking grapevine this time of year, and using them fresh, they probably don't even need soaking. What you should consider is shrinkage, because the vines will lose the sap they contain. You could weave extra tight, to allow for drying, or let it dry and weave a little more in later.

It's best to dry willow before using it, and then hydrate it enough to make it pliable with hot wet towels or a short soaking. I never actually did this, I always wove fresh willow, let it dry, and weaved more in later. The willow may bloom out with its pussy willow type things...it might be a nice accent. Again, willow shrinks when it dries, and can be the growth of the catkins can be halted by a quick oven dry, or in the attic. Coax the willow around your thumb, back and forth, before making tight bends with it.

Good luck and let me know how it goes!

Thursday, June 17, 2010

Kudzu

It's been several years now since I've even thought about weaving a basket. I'm considering taking a group to a kudzu patch and having a class. If I do, I'll post pictures.
Thanks!

Monday, November 20, 2006

Coiled Baskets

To weave a coiled basket from grasses (pineneedles, rope, etc...) tie a loose knot in one end of the grass. That will be the center of the bottom. Using the center of this knot as the anchor for your stitches, just keep adding grasses, and whip-stitch them into place. Try to keep your stitches in an ever-growing spiral, like this:
When you begin coiling, use inexpensive cotton twine or similiar. Polly would work too, and won't fade in the sun light. As your ability improves, choose better twine for the stitching: ideally, waxed linen. When your twine gets too short to make more stitches, just tie another piece on using a square knot plus a half hitch...otherwise the knot may slide out over the waxy twine. Try to put your knot either on the inside of the basket, where they won't be seen, or better, between one row of coils and the next (so that it can't be seen from the inside or outside of the basket). Once you begin actually making this type of basket, all answers to any questions will become evident.
Another way to begin this style of basket is to wrap thread around a washer, completely covering it's surface with dense stitching...then just start adding the grass or pine needles on the outer surface of the washer. My mom finds this easier than tying a knot in th grass.

Another idea is to find a pretty cabochon stone, rubber cement a piece of leather to the bottom of it, let it dry, poke holes around the outer edge of the leather, and anchor the grasses to it.
Some weavers use a hollow piece of cow horn or short piece of PVC pipe as a "gauge" to add the grasses with. This is especially helpful if you are making a large basket with large coils. It helps keep the density of the coil consistent.

Tuesday, November 15, 2005

Gathering grasses for baskets


Making a Bee Skep

A skep is a beehive made out of coiled grasses. this type of hive fell out of fashion when the more modern wooden ones became available. The newer hives made collecting the honey much easier.

Coiled baskets can be made with grasses, and autumn is the prime time to harvest them. Things to look for are texture, length, and color. Remove the debris from the clump, and cut the grass with scissors. Bundle them into manageable hanks. If the grasses are dried in the dark, they will retain their green color better. If dried in the sun, they fade to beautiful earth tones. I'm drying mine in the sun. Do not put the grasses directly away, without drying first, or they will mold.
We'll get back to coiled basketry later, when everthing is nice and dry.


Friday, October 21, 2005

Spin Grass Roots

Grass roots can be spun into a twine for basketry accents.
Select a clump of grass to pull, and wash off it's roots.
Pull apart the clump, contuinuing to wash the dirt from the roots. Using scissors, clip off all of the grass that was growing above ground.
Using a drop spindle, draw all of the roots out into a twine. To prevent molding, be sure to dry it thoroughly if you don't intend to weave it right away.

Saturday, September 17, 2005

Kudzu picking permit

If you live near or south of the Mason Dixon line, you are likely to be familiar with kudzu. You know, it's that stuff that, when you're driving down the highway, sort of looks like a big green blob, covering fields, trees, houses--anything in it's path! Kudzu is a good idea gone bad. It was brought into this country in the 1800's, and was promoted as a fast growing, low maintainance, privacy fence. Growing more than 18 inces a day in the summertime heat, it lived up to expectations. By the 1920's, farmers were trying to grow it as livestock feed. Someone else decided to grow it for erosion control. Lumber companies even tried to grow it as a cover crop! In short, kudzu was planted from Pennsylvania to Texas, and is covering everything in its path. Many states now consider kudzu an invasive species --others, a noxious weed, and have forbidden planting it under most circumstances. Recently, I tried picking kudzu in Hot Springs National Park. I was stopped by a ranger who asked me what I was doing. After explaining that am a weaver, baskets, blah, blah, I was told that I need to apply for a permit to pick kudzu in the park...that a certain percentage of my profits from weaving would be given to the park...WHAT??? for a noxious weed? I guess I'll let that little patch of kudzu be their problem...someday it may eat the whole park!

Sunday, September 11, 2005

Kudzu, Pueraria montana: Preparing kudzu vines for weaving baskets


Harvesting:
Although kudzu can be harvested anytime of year, July through the first frost are the prime times to pick kudzu's long, tough runners. It's best to find a field with long runners on the ground, as it's quite difficult--and dangerous--to pull kudzu out of trees. After the summer solstice, the fast growing green kudzu vines begin to get fibrous, making them durable!


Kudzu, as well as most weaving material, needs to be dried thouroughly, then rehydrated just enough before working with it. If green vines are weaved, the basket will be loose and not very durable. This being said, all of my early baskets were made out of green vines. If they loosened up, I'd just weave more vines into them. Also, some materials don't shrink as much as others, so it isn't as noticable--such as grapevine, which has minimal shrinkage. A new weaver, full of enthusiasim, doesn't really need to burden himself with weeks--months even--of prepwork before attempting to weave a basket! He might try weaving and decide it isn't for him. If you have the desire, just go pick some vines, and do it.
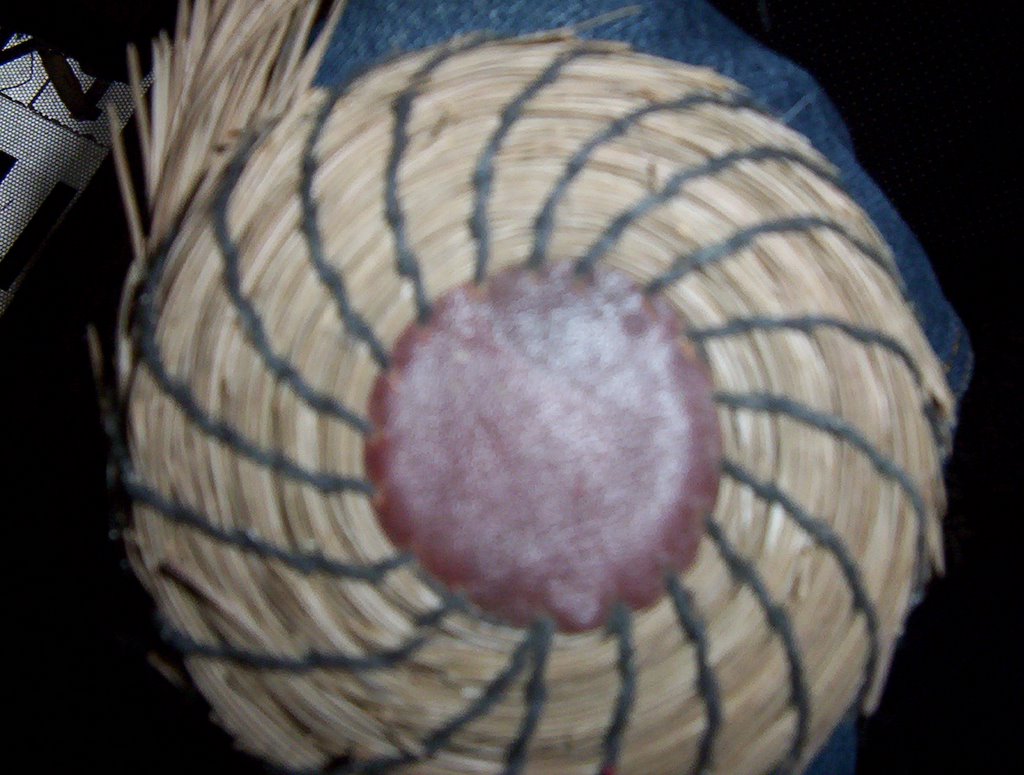
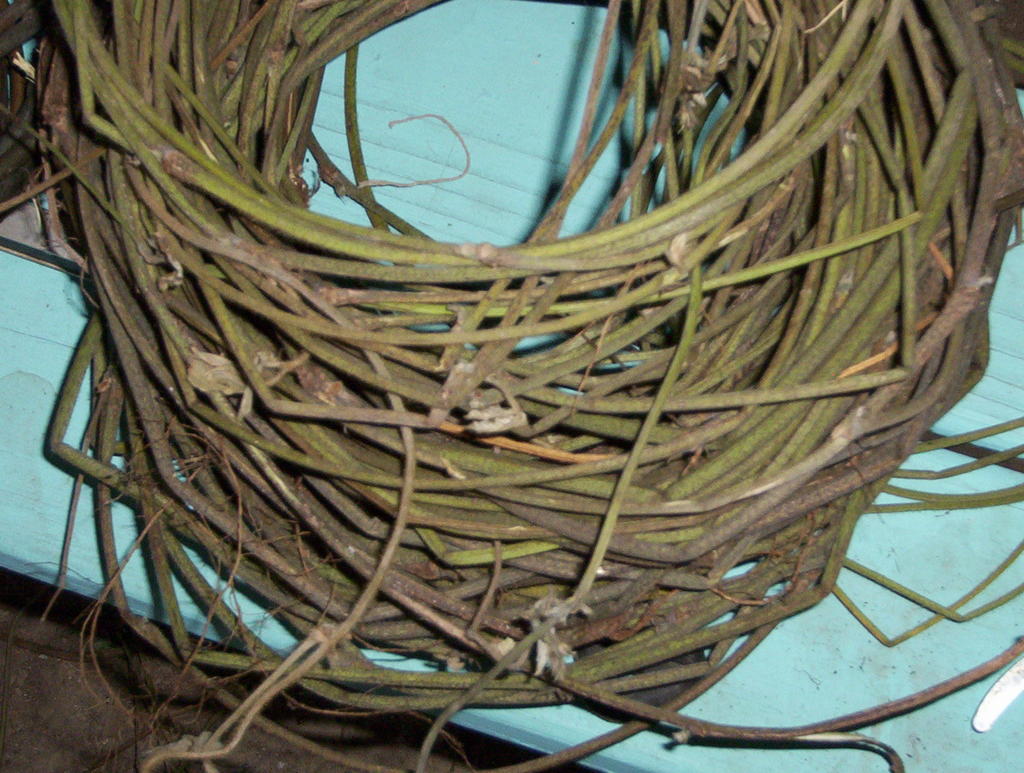
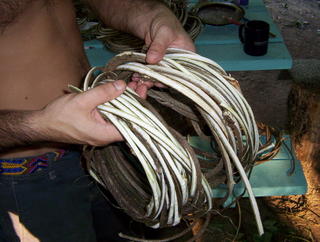
Kudzu vines can be weaved whole, green, or after drying and rehydrating, or they can be processed into finer fibers, which can be dyed. Store kudzu in loose coils (like wrapping a hose up on your arm), in a dry location. Sunlight helps change the green colored vines to a more pleasant brown.


If you'd like some guidance while experimenting with kudzu, here's how I prepare the fibers:

At any point in this process, you can just coil the vines, dry them, and return to working with them later.

By the time the vines are ready to weave, they will have been coiled and uncoiled several times. Grade the kudzu according to size as you work. It's much easier to select a 'thin' vine from a pile of thin vines, than from a pile of all sizes jumbled together.

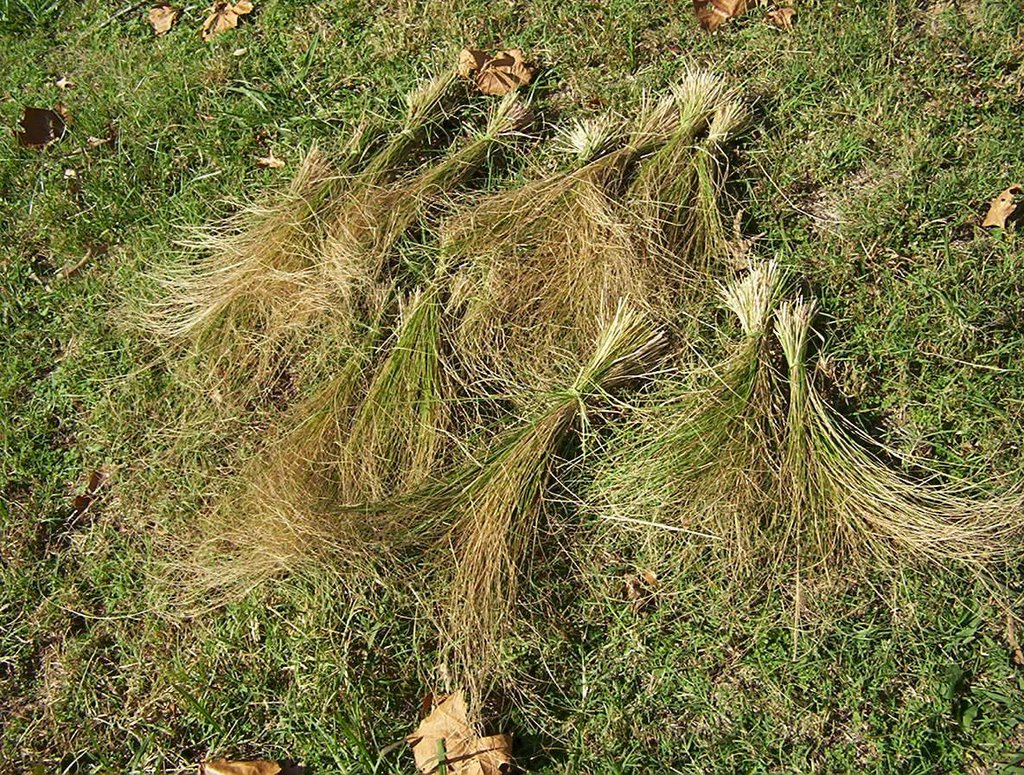
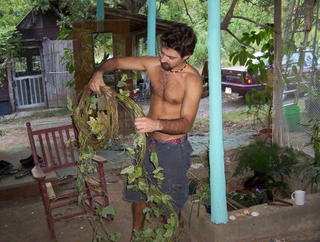
Go gather some vines. They are various shades of green, and some are gray. The greenest vines are the freshest growth. They grey vines are last years, or older. Pick any and all. I like to find vines the diameter of my pinky finger. Coil them into manageable loops. If you are going to completely dry these vines before you get back to working them, be sure to make your coils small enough to fit in your soak pot, whether a wash tub, bath tub, or stock pot. If the weather is nice, and you live in a rural location, you can soak your kudzu in a river, or lake, and weave while swimming/sunbathing.
Cleaning and sorting:
It's easiest to work with kudzu soon after it has been harvested. Uncoil the kudzu you've gathered, remove the leaves and twigs, and separate vines according to thickness. Be sure to recoil the vines into coils smaller than the diameter of your stock pot! The thinnest, greenest vines, are fragile right after picking, and need to be handled without kinking them. They lose about 70% of their weight during drying. They are extremely brittle before mellowing, so be careful not to crunch them during dry storage or while rehydrating.
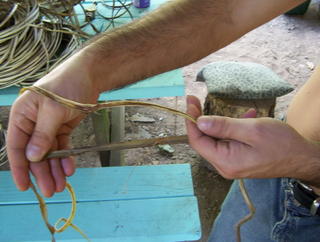

Splitting:
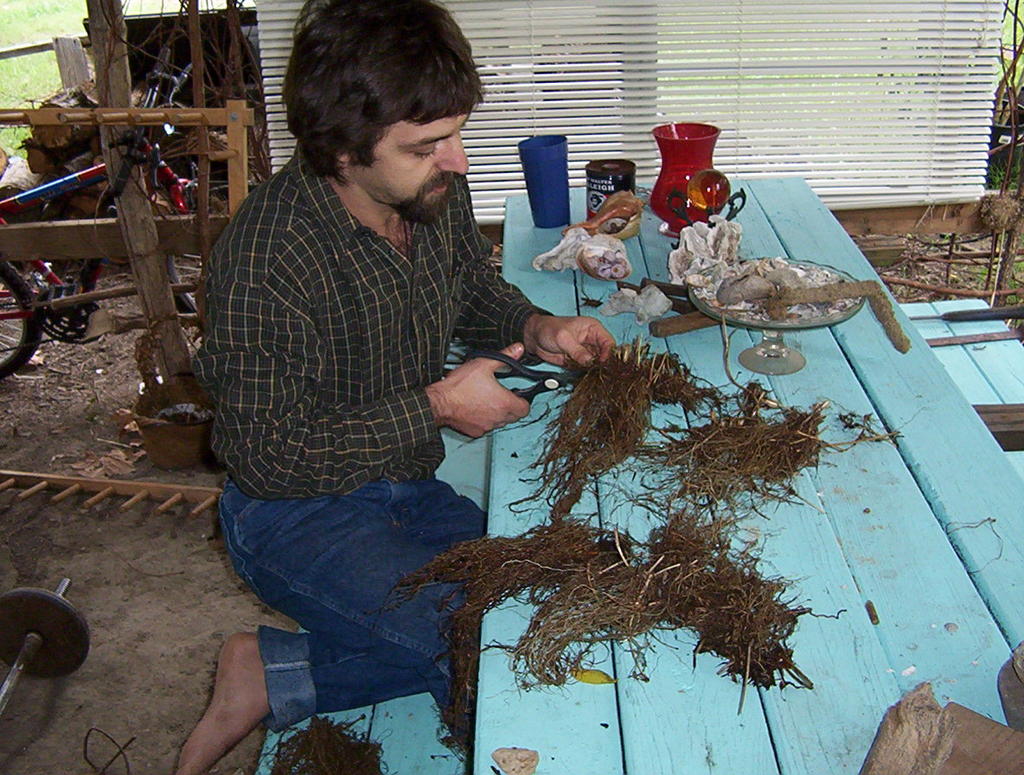
The larger vines should be split. Clip the end off so you have a smooth surface to start splitting. Using a kitchen knife, start to split the vine in half lengthwise, right through it's pithy center. Once you've split the vine, recoil it for storage.
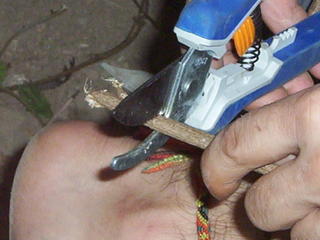
Cooking:
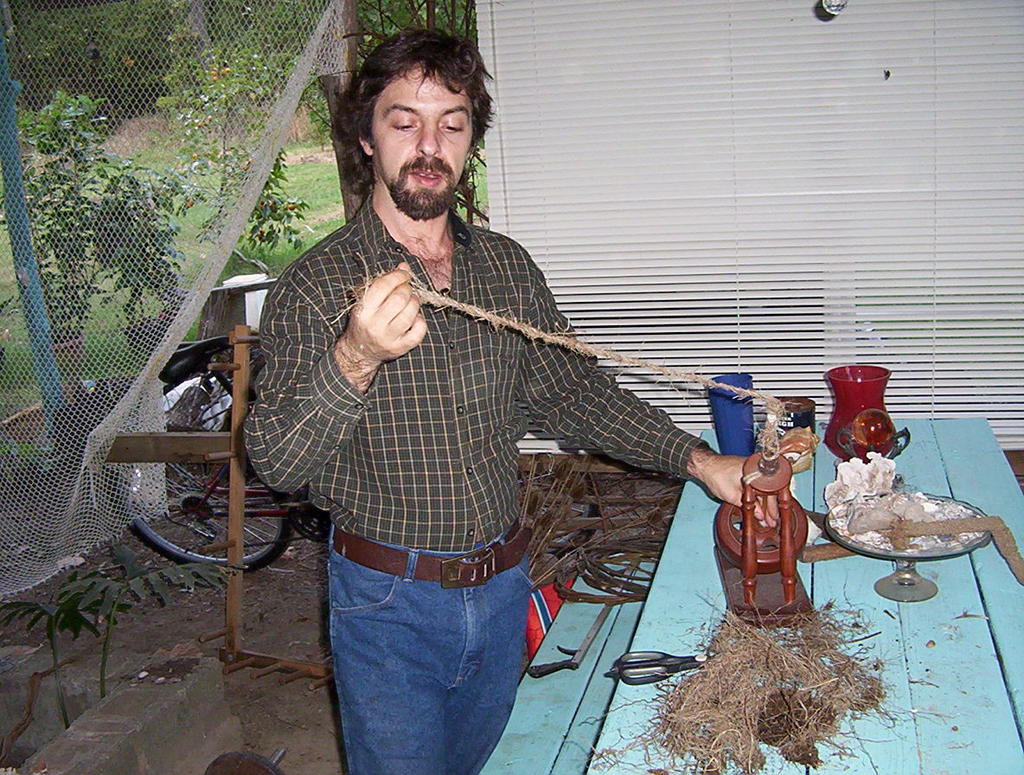
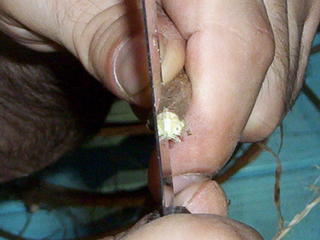
Carefully lower the kudzu into a stockpot of hot water. There is some debate about whether or not to boil the vines. I prefer to boil mine until they are good and soft, but I have been accused of over-cooking things before. If you are cooking dried vines, dip each end of the coil into the water before cramming the vines into the pot. This softens them a little, making them less likely break. Cook the kudzu until the pithy center changes from white to clear--it's much easier to scrape off. You might need to take it out of the water and test it. Different thicknesses may require different cooking times. You can use a variety of implements to scrape the pithy center out, such as this sea shell. A round-tipped knife also works. Generally, I prefer to scrape the pith while the bark is still on.

Peeling:
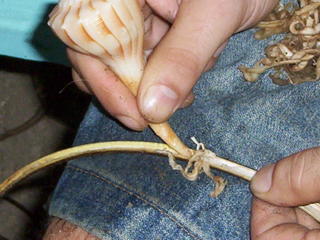
Next peel off the bark. Uncoil a vine after it cools a bit. Using the index finger of one hand, hold the bark and vine apart. Pull on the bark with the other hand away from you. Use which ever hand feels natural. Be sure to save the bark in loose coils--it looks like dried emuskin when woven!
Recoil all of the kudzu.


Peeling Kudzu Vines
Refining the weavers:
Next, uncoil a piece of split, cooked, depithed, and peeled kudzu, and split it again lengthwise with a pocket knife. Most of the pieces will have a split started. Just fullow the grain in the vine, and you'll be fine. Try to make the pices a consistent thickness. Coil them as you go.

The kudzu stockpile now consists of: thin green vines, split white fibers, bark, and whatever whole kudzu you've decided not to split. the kudzu is ready for weaving (or you could dye the split vines).

View My Stats